Monday, August 30, 2010

My coffee bar

This is one of my favorite spots in my house. I call it the coffee bar, a small little nook on my counter top that holds all of my favorite appliances. I have recently noticed that this seemingly small area of my home actually has great power over the outcome of my day...in a way. If I arrive here at 5:30 am, the promise of a good day is likely. If I arrive here at 7:15 am, you can bet your bottom dollar that I am also barking at children "hurry up and get in the car before we are late", and "you don't need to brush your teeth, I'm sure your breath smells fine", or maybe "grab a pop tart, we have no time for real food"...clearly a less than perfect start to a day. Such power a simple little place can have.

And don't think for one minute that the sign hanging on the wall hasn't been placed there quite intentionally. I read that every morning whether it is 5:30 am or 7:15 am, and every morning it speaks to me differently. Some mornings it is telling me to believe that through Him, I am capable of raising these children of mine. Some mornings it is telling me to believe that I am not slowly loosing my mind. Some mornings it whispers to believe "you are who He says you are, not who the world says you are ". And then there are some mornings it begs to just simply believe Him. Whatever the circumstance or the struggle, it offers a reminder of truth and encouragement...and a good cup of coffee. And whether that coffee cup is rushed or sipped and savored, it is indeed a gift, and my cup always runneth over.
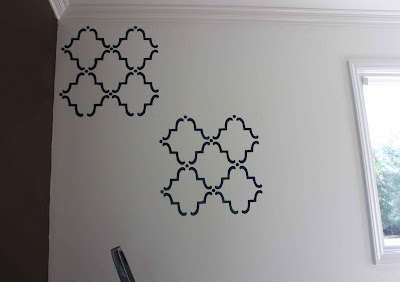
Amy

Friday, August 27, 2010

Milestones and Moments to Remember

And just like that, both my girls are in grade school. They didn't ask my permission to grow up so fast, they both just came walking down the stairs yesterday morning for school as if it was nothing. Caroline had a smirk on her face that told me she was both proud and a tiny bit anxious, but mainly just ready. And despite the lump in my throat, I was indeed excited for her.

Experiencing milestone moments as a parent is an interesting thing. It stirs emotions deep in your soul that are difficult to put into words. It's a feeling of wanting to cry, laugh, scream, throw-up, and worship, all wrapped up into one big package of "what the heck is going on" kind of feeling. Something too difficult to verbalize, but something every parent understands. These parental milestones just seem different and more raw than other life milestones. The role of a parent is just naturally different from other roles, it's a privilege set apart from other hats that we wear in our lives. It's unique, and the moments we experience that stem from this role seem to stir deeper emotions...and this makes me think of our heavenly Father who is a parent too. I think about His perfect love for His children, and I think about how He must feel on a daily basis watching milestones of His children happen all over the world. And since my feelings and emotions and love are but a reflection of His, how much deeper must His feelings stir, and how much faster must His perfect heart flutter while watching His children grow.

Though these emotions run deep for us as parents, they are simpler for our children. They do not yet understand the gravity of things like starting Kindergarten. To us as parents, it is one huge leap in the direction of growing up, but to them it is just starting Kindergarten...as it should be of course. While getting ready to leave Caroline that first day of school, I spent one more moment double checking everything in her bag to ensure she had what she needed. I asked if she had her lunch, and she responded by saying "yes, and even though it looks disgusting, I promise I will eat it".

And so just like that my baby girl grew up, left home for her first day of school, and bravely walked into that lunch room with a disgusting sandwich for lunch. What a milestone, what a moment to remember.

Amy

Wednesday, August 25, 2010

An attempt at explaining stenciling...and a few other things

Sometimes I make things more difficult than they have to be. My stenciled wall was such a thing. Because I like to play with decorative finishes, I was determined to use the color combination of these two products for my stenciled pattern. Aren't they lovely? I mixed them equally at a 50 /50 ratio, and what I came up with was indeed lovely...just not necessary. In hindsight, I should have just used craft paint. It would have been simpler, less expensive, and I would have achieved the same look. Having said all that, if you are anything like me and determined to find the hard way, check out the Faux Effects website to order decorative products. If you are smart, just go to Micheal's and pick out a good shade of Folk Art craft paint to use as your color.

OK. So once you have your color picked out, you will also need to purchase "repositional spray adhesive" to hold your stencil on the wall. You can purchase such a thing at any craft store. And speaking of stencils, if you have never checked out Royal Design Studios, you need to. It's owner, Melanie Royals, carries the most extensive and beautiful line of stencils I have ever seen. I purchased my lattice stencil for this project from her for about $40. They come with detailed instructions and are excellent quality.


Step one to stenciling a room is to plan your layout. If you purchase a stencil from Royal Designs, it will come with instructions on how to do this. Her stencils have "registration marks" in each corner of the stencil. These marks allow you to line your stencil up all the way around your room, keeping your spacing accurate. It is helpful to mark all the way around the room where all your registration marks are so that you can freely move about the room during the process. You cannot stencil one stencil right next to another, as you will be overlapping on wet paint. You must skip about the room while you allow the paint to dry, and the only way you can do this is if you have pre-marked all of your registration marks. Does that make sense?


Step two is to spray the back of the stencil with repositional spray adhesive so that it will stick to the wall and prevent your product or paint from leaking underneath. Are you already thinking that I am weird and completely incapable of explaining this process? No worries, sweet Caroline doesn't think I make any sense either.

Step three is to line up your stencil with the registration marks where you have decided to begin the process on your wall.

Step four is to start rolling your product over the opening of the stencil.

And then repeat...And repeat...

And repeat...

And repeat...

And then stop when you finish. The process is not difficult, it is just tedious...and it may require a glass of wine.

The window treatments. The two long window treatment panels are hanging on a rod behind the valance. The valance has been attached to a 2 x 4 with a staple gun and hung on the wall using "L" brackets...all my cute carpenter's work.

I only hire the very best seamstresses...they do great work.We carried the bed out and spray painted it red. It was killing me not to set the entire bed up with bed linens and do a photo shoot outside. Seriously, how stinkin' cute would that have been...my kids all cuddled up in white linens on this bed outside?!?! But I had no time for such playful things.

I had pillows to make. Remember I told you that I loved the look of Serena and Lily's little buddy pillows. I printed the image out on transparency paper and pulled out my overhead projector. Yes, I own an overhead projector and it is one of my favorite toys. I bought it off ebay for $30 and it was worth every penny. Now I am well aware that there are fancy shmancy computer programs out there that will do such things, but I prefer the prehistoric method. I can easily turn the projector on and off...no computer program to learn that will cause me to feel bad about myself when I cannot learn how to use it.

I traced the pattern onto duck cloth and cut it out.

Border the edge of the dog cutout using a zigzag stitch, to prevent the fabric's edges from freying.

Steam a Seam is a product that will stick fabric to fabric. I use it for appliques on shirts for my girls, and it worked great for this project as well. Directions are included, but you basically just use an iron to steam and secure the cutout into place.

There are two smaller details in the accessories of this room that I think are worth mentioning. In case you are new to Playing Sublimely, I have two tutorials out there in blogger world for monogrammed candles and also decoupaged picture frames. Click here for the candle tutorial, and click here for the picture frame tutorial.


I am hesitant to click publish on this post, as I feel it to be a poor tutorial on the "how to's" of this room...but if I am being honest, my youngest daughter starts kindergarten today and my brain is somewhere else. As it should be I suppose. But please feel free to email me if you desire to know more about the stenciling process...or anything else for that matter.
Anybody else sending off a kindergartner this year?

Amy

Monday, August 23, 2010

Room Reveal: a great room for a little man

Several weeks ago, I decided I was going to convert Thomas' nursery into a craft room. I felt a little guilty considering my baby boy is only a few months shy of 2 years old. It felt like I was forcing him to grow up before his time. The only was I could justify such selfish behavior on my part, was to create an oh so fun room for our little guy. So I got to work. Here is the before. Yes, it is painful to look at, and yes I had already tried out a little bit of dark brown paint on that back wall:
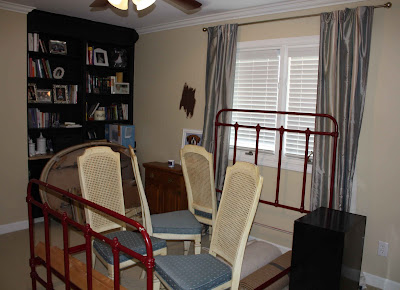
And here is the after...

I did a lot of decorating with what I had. We used many pictures and toys that used to be my husband's when he was a tiny tot.
We got creative and "fingerprinted" our dog. I think it adds to the charm of the room.
More little man accessories...
These are items I brought over from his nursery that I just wasn't ready to let go of...

My grandmother's quilt she made for Thomas when he was born...
I used a lot of my sister's photography...
Here is a little bit of copycat decorating. Have you seen Emily's boy's room over at Jones Design Company?
Emily's framed monograms are much fancier, but the idea is the same.
A few more details worth showing...
Here is more decorating with stuff we had around the house, like baseball caps and my collection of the Left Behind book series. Maybe in about 15 years he will read them.
Have you seen these "Little Buddy" pillows from Serena and Lily? They are darling, but I refuse to pay their price tag...so I made my own.
A "find all your cousins and grandparents" collage.
And finally my favorite picture of my kids. He is indeed our little "Ladies Man".
Come back next time and I will show you how I did some of these decorating tricks, like my stenciled walls, and the Serena and Lily knock off pillows just to mention a few. Hope to see you soon!
Because I'm feeling a little blogger happy today, I'm linking up with THREE of my favorites: my blogger friend Rhoda at Southern Hospitality because I used so many found treasures that were my husband's, The DIY Showoff, and Sumo's Sweet Stuff.

Amy

Tuesday, August 17, 2010

Abundant Blessings

My Caroline has been sick this past week, probably as sick as she has ever been. And just like any bump in the road, this bump has served me a swift reminder of the abundant blessings I have in my life...abundant blessings that too often go unnoticed in my day to day lifestyle. Simple, everyday blessings that are individually wrapped gifts from our Creator. Things like red geraniums and juicy blackberries.
And children in summer clothes and bare feet.
Plump, ripe tomatoes that go on and on and on.
And dirty bottomed feet that are too sweet to cleanup.Barrel fulls of blessings, we just have to accept the invitation to notice.
Noticing these everyday gifts today with Emily over at Chatting at the Sky, and Darcy at Life With My 3 Boybarians.

Amy